Summary
Tagging a document serves 2 major purposes:
- Allowing users to see specific information at a high level on a cover sheet
- Using tags to filter reports on, or build out reports with specific document information
Using a template allows a user to fill out a list of preset tag fields, set up by an administrator, with all of the information that has been deemed important to fill in for that document.
Instructions
Step 1: Click into the document you would like to tag.

Step 2: On the left-hand side, click on the tag icon, which will bring up tagging options.

Step 3: Select a corresponding tag template from the dropdown list. The selection may be dependent on what the administrator has set up. If you have any questions on tag template set up, please contact your administrator.

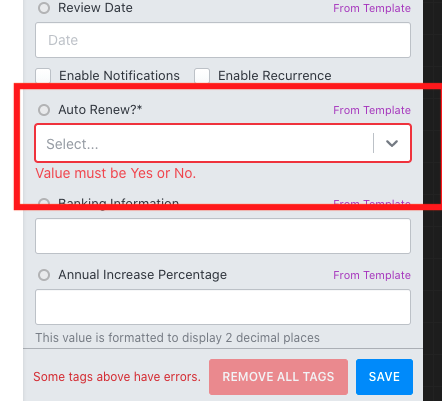
Step 4: A list of tag fields will populate below the tagging options to be filled in. If any tags have an asterisk next to them, that field is required to be filled in.

Step 5: Use the document to fill in the information in the tags by either highlighting information from the document to link, or typing the information in manually.

Step 6: Save your changes once all of the applicable fields have been filled in. Note: If a field is required (marked by an asterisk), but has not been filled in, you be unable to save your changes until the required field has been filled in.

Step 7: Once saved, you will see the tag icon next to the document is green. This indicates that there is tagged information on the document. You can see more information by hovering over the document, or clicking into the tag to see a full cover sheet with all tagged information.

